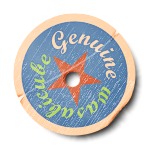
Background
The inspiration for this article came from Cameron Moll’s That Wicked Worn Look series, and from a reader’s enquiry about how I used Corel PHOTO-PAINT’s Weather effect to age an image.
Implementation
The starting point I usually take when creating graphics for the Web is to create a vector image in CorelDRAW.

By trial and error I’ve found it best to scale the image by 400%, say, before exporting it to PHOTO-PAINT. Once there I scale it back to its original size. This gives a much smoother result than importing CorelDRAW images directly.
Next, in PHOTO-PAINT, I pretty much follow Cameron Moll’s first tutorial in order to create the creases and worn edges.

Once happy with the edges, I apply the PHOTO-PAINT’s Weather effect (Effects | Creative | Weather). With a bit of experimentation I’ve found that a good result comes from applying the effect twice:
- Apply the effect with an angle of say 80 degrees with a strength of 15, size of 1 and a randomize value of, say, 165.

- The apply it again at an angle of 90 degrees, with a higher strength, say 85, again with a size of 1 and a randomize value of 194, for example.

Note: play around with the Randomize button until you get a scratch pattern that looks natural for each application of the effect.
Perhaps the key thing I’ve discovered is to have the two angles of weathering – it somehow looks more convincing than having all the scratches going in the same direction.
